Want to build a gravel shed foundation but not sure where to start? You're not alone. Many first-time builders worry about digging too deep, buying too much stone, or watching the base sink later.
This guide walks you through the whole job. You'll learn how big the pad should be and how much gravel to order.
Then we'll cover each build step, from digging to compacting. We'll also look at why bases fail and how to check yours before the shed goes on.
The steps here follow the same basic method most shed builders and suppliers recommend. Follow them in order, and you can build a base that stays level and drains well.
How big should a gravel shed base be, and how much gravel do you need?
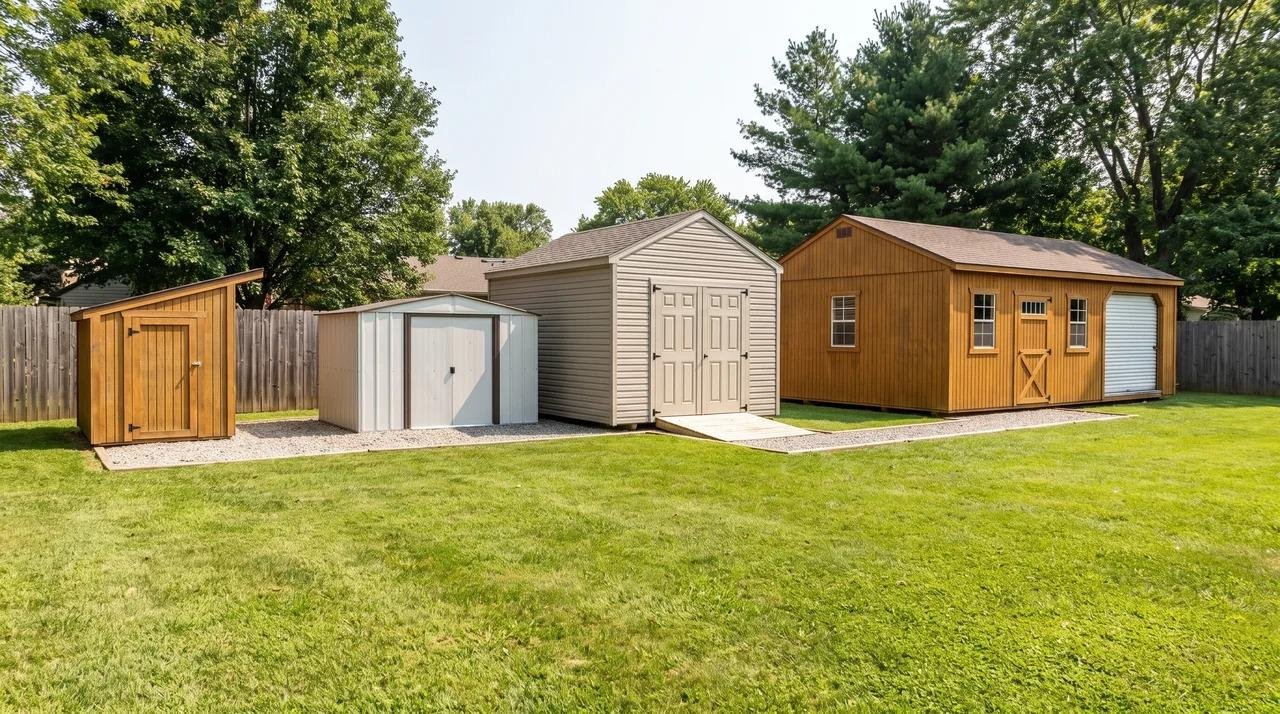
A gravel shed base should extend about one foot past the shed on every side and be 4 to 6 inches of compacted crushed stone deep. That extra foot lets rain run off the shed and away from the skids instead of splashing back onto them. For an 8×10 shed, build a 10×12 pad.
Choose your depth based on the site, not just the shed's footprint. Four inches suits a small shed on firm, well-draining ground. Go toward six inches, or deeper, for a larger shed, clay or soft soil, or a spot where water collects.
To work out how much stone you need, multiply length × width × depth (all in feet), then divide by 27 to get cubic yards. For the 10×12 pad at 4 inches (0.33 feet) deep:
10 × 12 × 0.33 = about 40 cubic feet, and 40 ÷ 27 = about 1.5 cubic yards.
Compaction squeezes the stone down, so order a little more than the raw figure, roughly 10% extra, and confirm the amount with your supplier.
Before you start digging, check your local rules, since some areas require a permit for sheds above a certain size.
How do you build a gravel shed foundation step by step?
Building a gravel shed base means clearing to firm ground, framing the edges, laying fabric, then filling with compacted angular crushed stone.
Each step depends on the one before it: a bare, firm subgrade comes first, then containment, then separation, then the stone in compacted layers.
Skip one, such as leaving topsoil in place or omitting the fabric, and that is usually where the base goes wrong later.
Excavate and level the ground
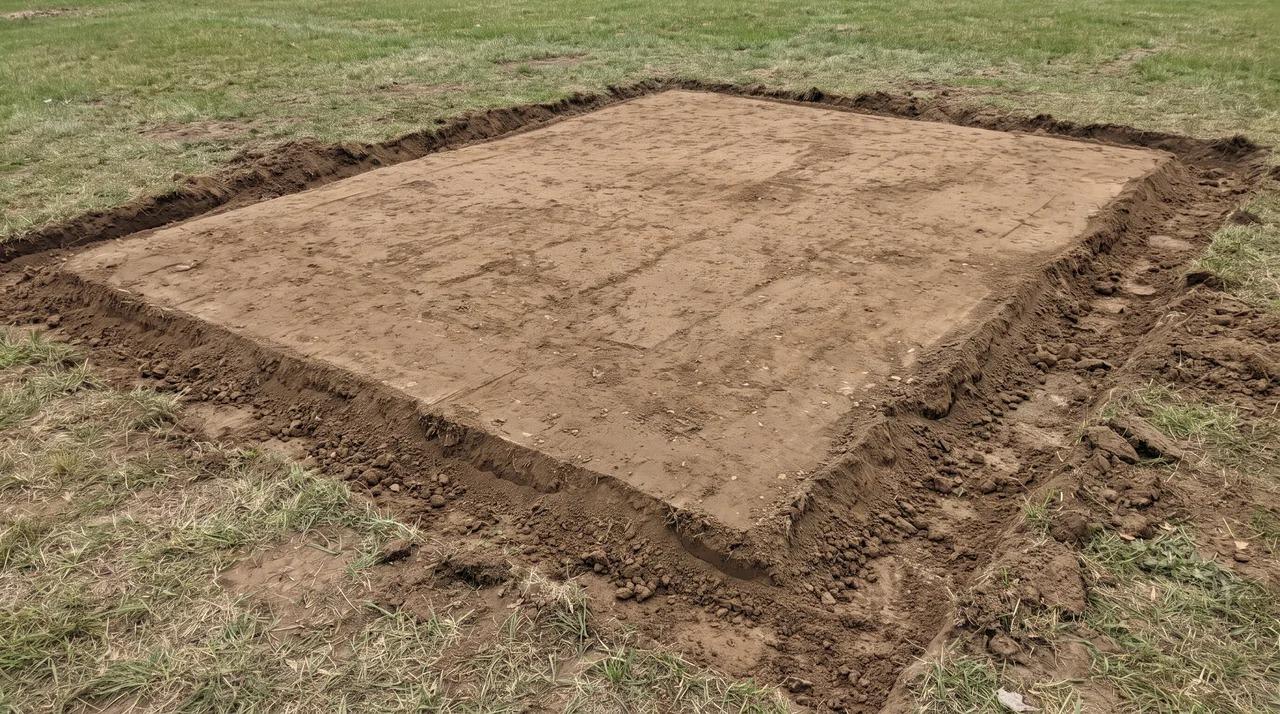
Mark out the pad, then remove all grass, roots and topsoil down to firm dirt, usually 4 to 6 inches. For the full picture on choosing a spot, clearing, and drainage, see our guide to site preparation for a shed.
Cut the area level, but don't leave it as a shallow bowl that traps water. If your yard slopes, learn how to build a shed base on uneven ground first. Grade the finished pad so it sits slightly above the surrounding ground, and water drains off the edges instead of pooling under the shed.
Build the perimeter frame
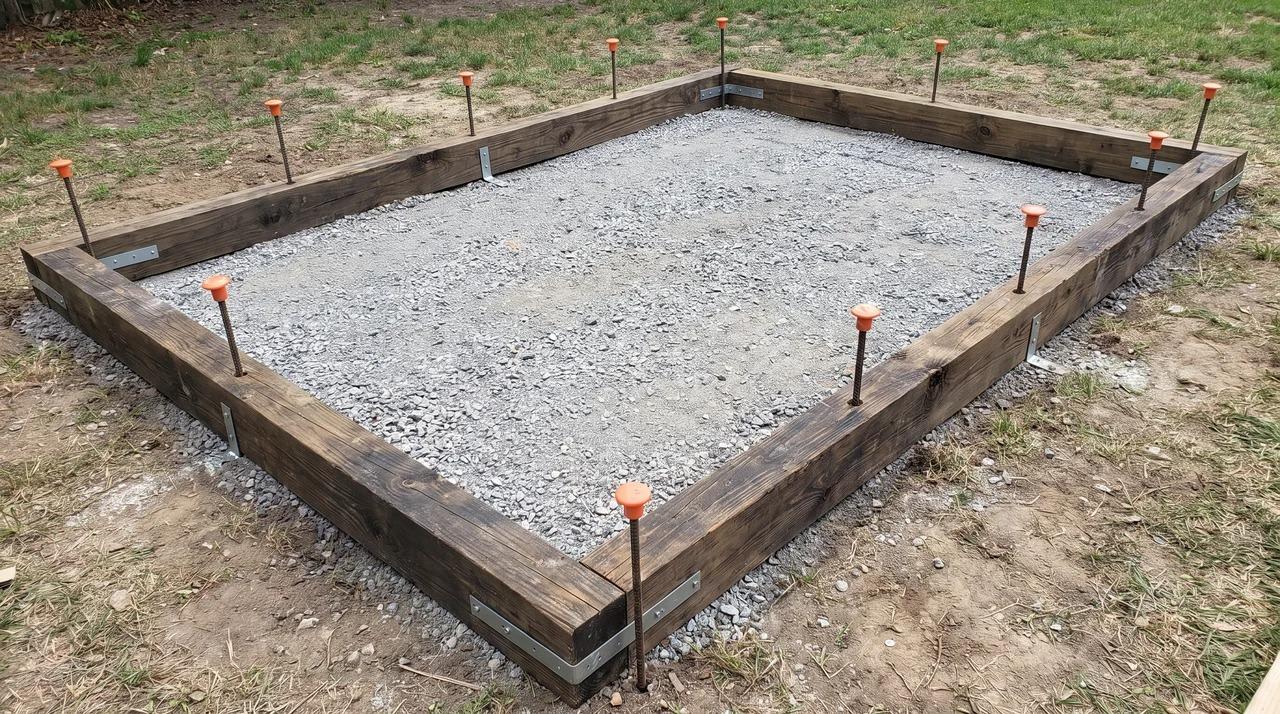
Build the frame from ground-contact pressure-treated 4×4 or 4×6 timbers. Join the corners with heavy-duty brackets, then anchor the frame with rebar stakes driven through or alongside the timbers so it can't shift.
The frame does more than tidy the edges. Loaded gravel pushes outward, and spreading starts at the edges. A properly anchored frame holds the stone in place and keeps the pad's shape for years.
Lay the landscape fabric
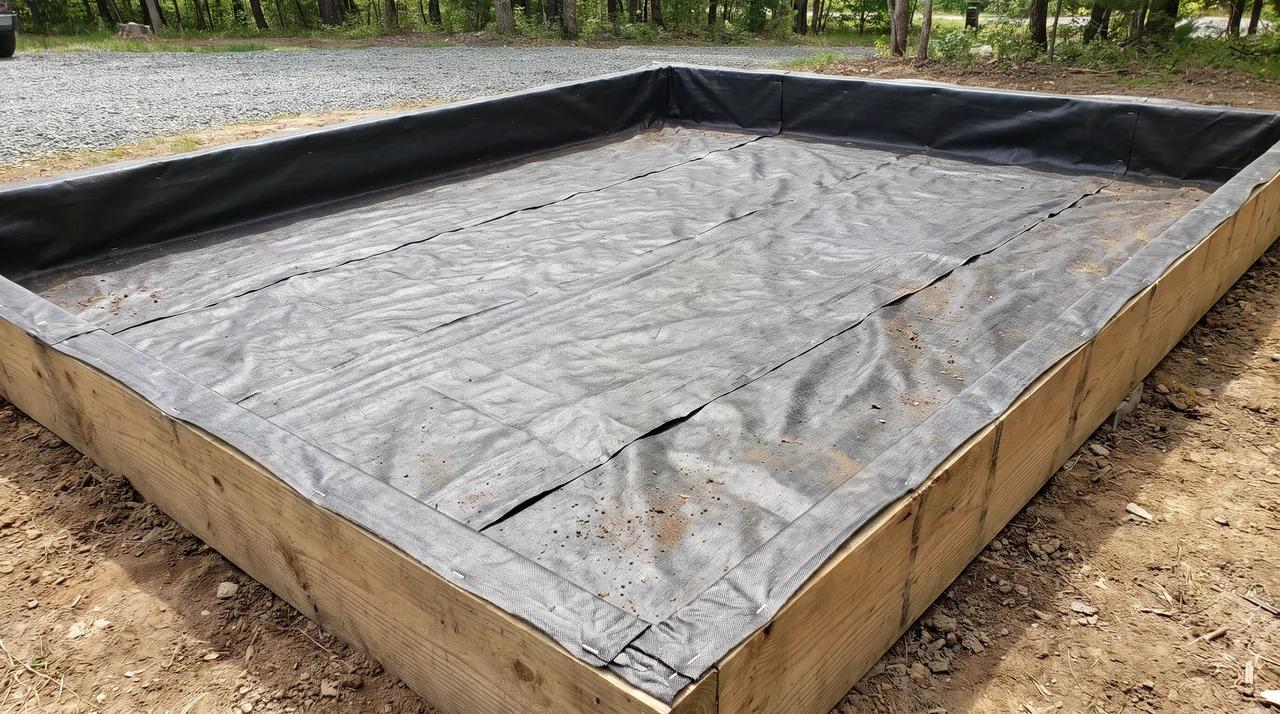
Line the inside of the frame with commercial-grade woven landscape fabric. Cover the whole base and run it up the inside faces of the timbers. Overlap any seams by several inches so no soil shows through.
Weed control is a side benefit. The fabric's main job is to separate the stone from the soft soil beneath. Without it, gravel gradually presses down into mud and the base loses depth, which is a common reason pads sink unevenly.
Add gravel and compact it in layers
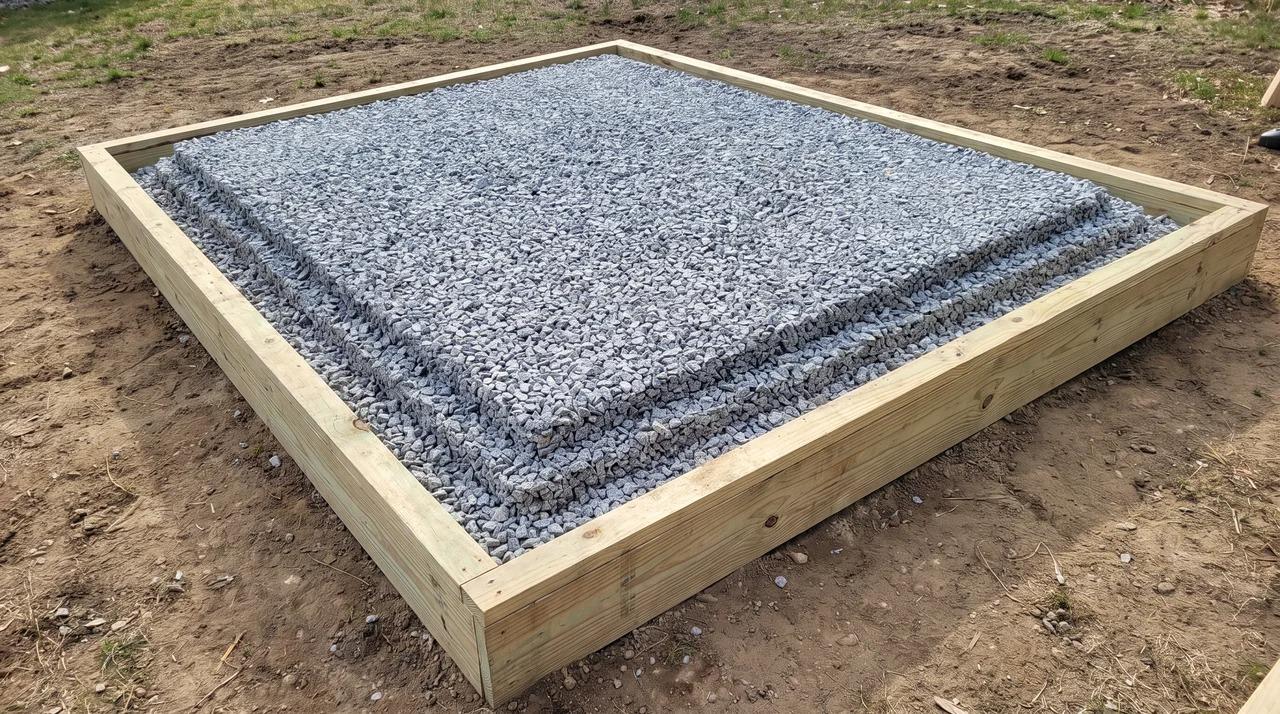
Fill the frame with clean, angular ¾-inch crushed stone such as #57, to a depth of at least 4 inches. Angular stone works because its sharp, irregular faces interlock when compacted, forming a firm, stable surface that still drains freely.
Rounded pea gravel does the opposite: the stones roll past each other under load and never lock, so the surface keeps shifting under the shed.
Don't dump all the stone at once. Spread it in shallow layers of about 2 inches, level each one, and tamp it thoroughly with a hand tamper or plate compactor before adding the next.
Compacting in lifts reaches the full depth, whereas one thick layer only firms up at the top and stays loose underneath. Finish by raking the top surface flat and checking it with a long level before moving on.
Why do gravel shed bases fail, and how do you prevent it?
Most gravel shed base failures come from soft ground, poor drainage or unsupported edges, not from the gravel itself.
- Soft ground: Uncompacted soil or leftover topsoil sinks unevenly. Dig to firm dirt, compact it, and lay fabric.
- Water pooling: A pad in a low spot or bowl holds water. Grade it slightly above the surrounding ground.
- Spreading edges: Loaded gravel pushes outward. Anchor the frame with brackets and rebar stakes.
- Clay or wet soil: Increase the depth toward 6 inches and improve the preparation. More stone alone won't fix soft ground.
How do you check the base is ready before placing the shed?
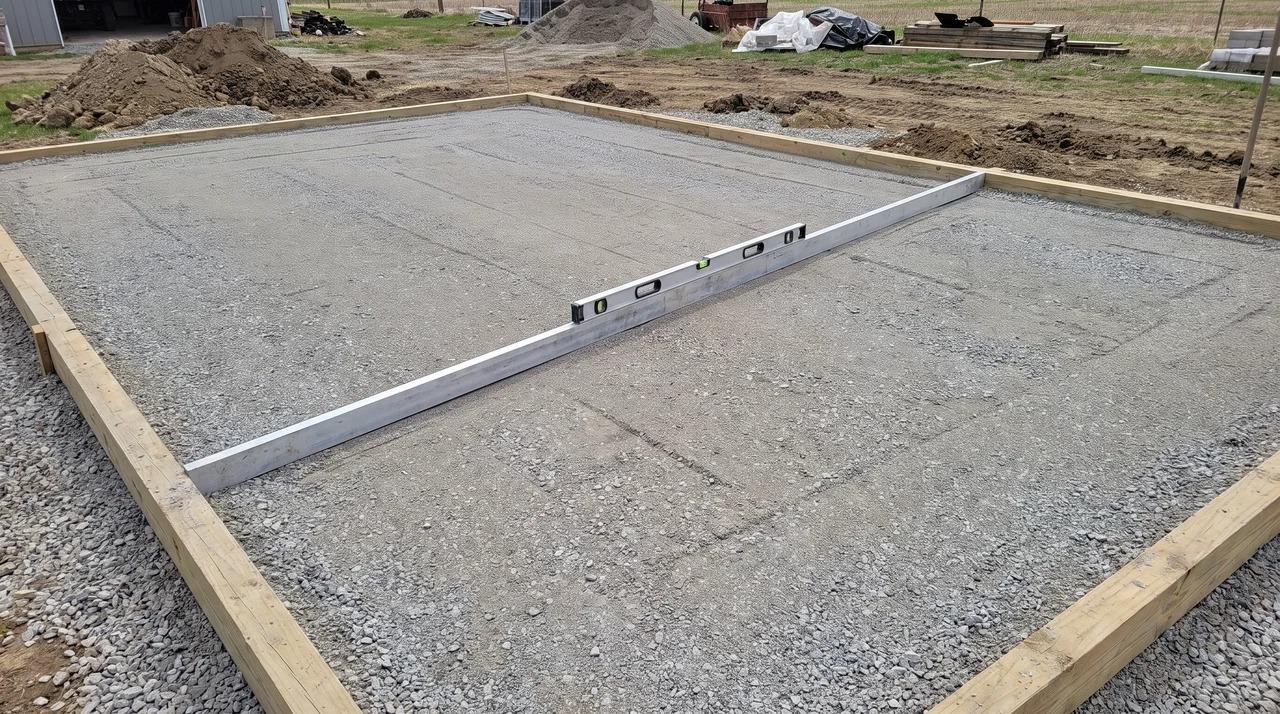
A ready base is level in every direction, firm underfoot and draining away from the shed. Lay a long straightedge with a level on top across the pad, and check both directions and both diagonals.
Then walk across the whole surface. It shouldn't shift, and your boots shouldn't leave deep footprints. Finally, confirm that water will run off the edges instead of pooling on the pad.
If you find a low spot, fill it with more stone and re-tamp it before the shed goes on.
Final Verdict
A solid gravel shed foundation comes down to a few basics: firm ground, a sturdy frame, fabric underneath, and angular stone packed in layers.
Get those right, and the base will carry your shed for years without fuss. Once the shed is in place, you can start finishing a shed interior to make it usable.
Now it's your turn. Grab a tape measure, mark out your pad, and start with the digging. Small, careful steps add up fast.
Have a question about your site or soil? Leave a comment below, and I'll help you sort it out.
Frequently Asked Questions
Is gravel a good foundation for a shed?
Yes, a gravel base is a good choice for most small to medium sheds. It costs less than concrete, drains well, and needs no curing time. It also keeps the shed's skids off wet soil. Very large or heavy sheds may need a stronger base.
Can you put a shed directly onto gravel?
Yes, if the gravel is compacted, level, and made of angular crushed stone. Loose stone shifts under weight and lets one corner sink. Resting the skids on a firm gravel base also keeps the floor framing off the ground and away from moisture.
How deep should the gravel base for a shed be?
Most sheds need 4 to 6 inches of compacted crushed stone. Four inches works for small sheds on firm, well-draining ground. Go closer to six inches, or deeper, for larger sheds, clay or soft soil, and wet sites. Ground conditions matter as much as shed size.
How much gravel is needed for a 12×14 shed foundation?
A 12×14 shed needs a 14×16 pad if you extend one foot on every side. At 4 inches deep, that is about 75 cubic feet, or roughly 2.8 cubic yards. Add about 10% for compaction, so order around 3 cubic yards and confirm with your supplier.